Hover a mouse pointer over the Tools menu link to display its drop-down menu.
Click
Area Groups to open the Area
Group screen.
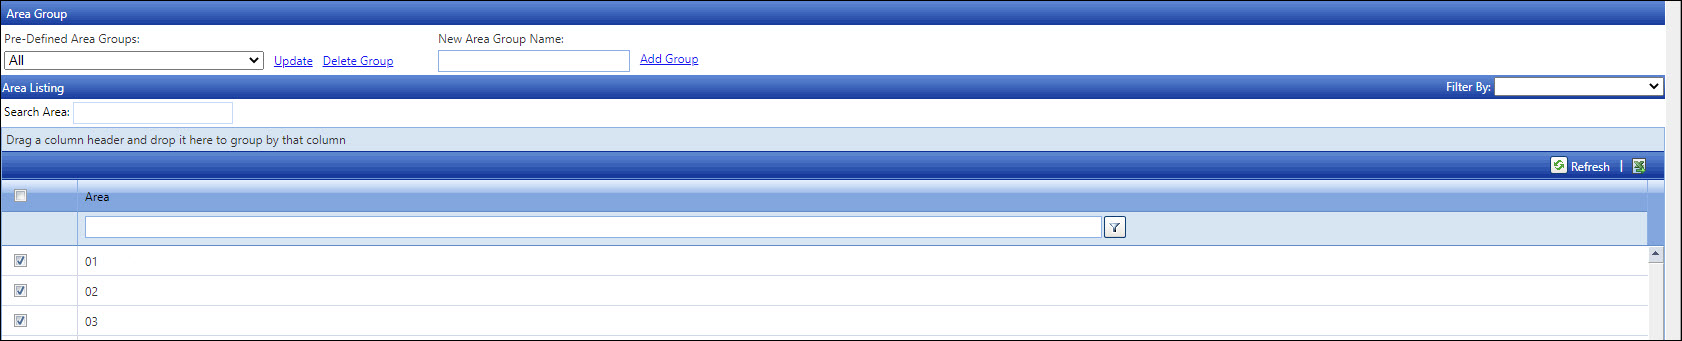
Track Admin has a feature that allows an assignment of specific areas to different area groups. The area groups feature is used to allow the administrator to select a specific area group when assigning the areas to each user. The user will only have access to those specific areas when using the Track application.
Hover a mouse pointer over the Tools menu link to display its drop-down menu.
Click
Area Groups to open the Area
Group screen.
From the Area Group screen, enter a new area group name into the New Area Group Name text box.
Click Add Group to save and display the new area group name in the Pre-Defined Area Groups drop-down list.
Click the checkbox located at the column header to select all areas that are displayed in the grid.
From the Area Group screen, select an area group from the Pre-Defined Area Groups drop-down list.
If using the Area ID Search, enter alpha-numeric characters into the Search Area text box.
From the grid, click a checkbox on a line item to select an area that will be included in the selected area group.
Once completed, click Update to add the selected areas to the selected area group.
Click the checkbox, located at the column header, until all checkboxes are deselected.
From the Area Group screen, select an area group from the Pre-Defined Location Groups drop-down list.
If using the Area ID Search, enter alpha-numeric characters into the Search Area text box.
From the grid, deselect a checkbox on a line item to remove the selected area from the selected area group.
Once completed, click Update to remove the selected areas from the selected area group.
From the Area Group screen, select an area group from the Pre-Defined Area Group drop-down list.
Deselect all areas by clicking the checkbox located at the header column.
Click Update to remove all of the areas from the selected area group.
Click the Delete Group link. The delete confirmation pop-up message appears.
Click OK to delete the selected area group.